Building a Payment API Integration from Scratch
Problem
Modern applications often rely on third-party payment providers such as Stripe and Square to complete transactions. However, directly integrating with these APIs can create tight coupling, duplicated logic, and inconsistent developer experiences.
Solution
This guide walks you through building a payment integration layer in your code that abstracts third-party complexity and provides a consistent interface.
Overview
This guide will walk you through building a complete payment API with the following steps:
- Explore the API with Hoppscotch.
- Mock a payment provider using WireMock Cloud.
- Build an integration service using Node.js.
- Document the API with Open API and Swagger UI.
- Load test the API using k6.
Payment API Interface
The payment API in this tutorial will have the following methods:
- POST /payments – Creates a payment transaction.
- GET /payments/{id} – Gets information on a payment.
- POST /customers – Creates a customer.
Explore the API with Hoppscotch
Hoppscotch provides an interface that allows you to test mock REST API calls and view the responses. Experiment with creating the API methods defined below.
Note: The responses you receive in Hoppscotch won’t match the responses in the finished application. The responses below will be expected in the final version of the API integration.
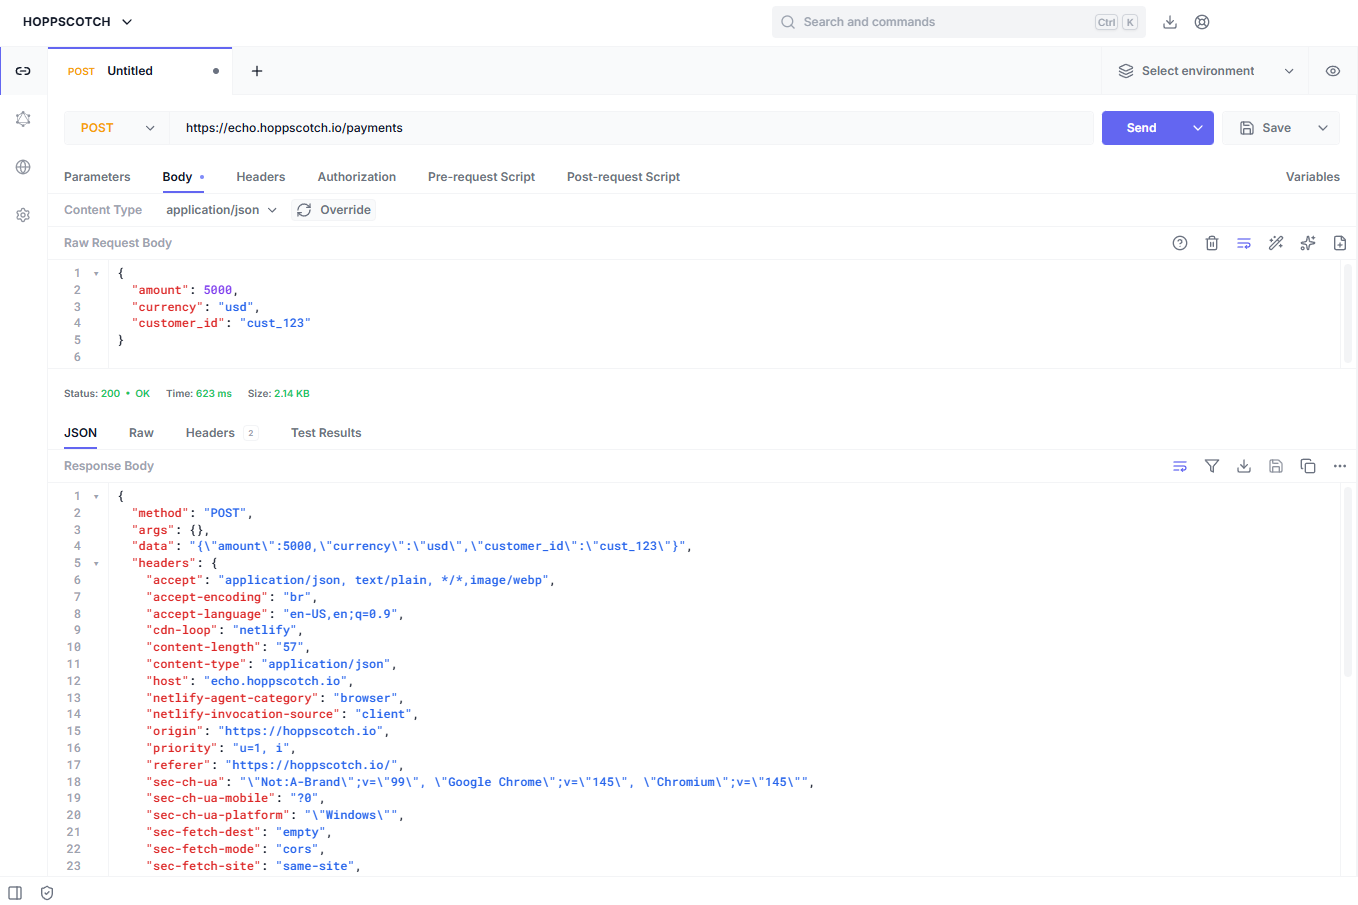
POST /payments
Create the following POST request to simulate creating a payment using the API.
                            POST https://echo.hoppscotch.io/payments
                            Content-Type: application/json

                            {
                                "amount": 5000,
                                "currency": "usd",
                                "customer_id": "cust_123"
                            }
Expected Response
                            {
                                "id": "pay_456",
                                "status": "succeeded",
                                "amount": 5000
                            }
GET /payments/{id}
GET https://echo.hoppscotch.io/payments/{id}
Expected Response
                            {
                                "amount": 7000,
                                "status": "OK",
                                "customer_id": "cust_234"
                            }
POST /customers
                            POST https://echo.hoppscotch.io/customers
                            Content-Type: application/json

                            {
                                "name": "John Smith",
                                "company": "Company Name"
                            }
Expected Response
                            {
                                "id": "cust_523",
                                "status": "succeeded",
                            }
Mock the Payment Provider with WireMock
Instead of relying on a real payment provider, like Stripe, you’ll simulate one with WireMock.
Complete the following steps to start mocking the API with WireMock:
- Login to WireMock.
- Select REST protocol template > Manual.
- Click New Stub and enter the following:
                            Method: POST
                            URL: /payments

                            Response
                            Content-Type: application/json
                            Status: 200
                            Body: json
                            Body Content:
                            {
                                "amount": 5000,
                                "currency": "usd",
                                "customer_id": "cust_123"
                            }
Test Your Mock Payment Endpoint
You can use a tool like Postman to test the mock endpoint you created with WireMock, for example:
POST https://[WireMock URL]/payments
WireMock returns the simulated payment response.
Repeat the above steps for creating endpoints in WireMock for the remaining methods in the payment API.
Build the Node Integration Service
Now you can create a small Node.js payment integration service which will act as a middleware layer between your app and the mock payment provider.
This service can be extended to allow access to other third-party payment providers without the code being tightly coupled to them.
Step 1: Install Node.js
You can download Node here: https://nodejs.org/en
Step 2: Project Structure
Create a directory for the Node application with the following structure and files:
                    payment-api/
                        - server.js
                        - routes/
                            - payments.js
                        - package.json
Create the payment-api directory and the files and folders defined above.
Step 3: Install Node Dependencies
Run the following commands in a command prompt to install the required Node dependencies:
                            npm init -y
                            npm install express axios
                            npm install swagger-ui-express yamljs
Step 4: Create Server File (Server.js)
Update server.js with the following code:
                            const express = require("express");
                            const payments = require("./routes/payments");

                            const app = express();
                            app.use(express.json());

                            app.use("/payments", payments);

                            app.listen(3000, () => {
                                console.log("Payment API running on port 3000");
                            });
Step 5: Create a Payment Router (Payments.js)
Add the following code to payments.js which will route requests to your WireMock API:
Note: You’ll need to add additional routers for the remaining methods defined in the API.
                            const router = require("express").Router();
                            const axios = require("axios");

                            router.post("/", async (req, res) => {

                            const payment = await axios.post(
                                "https://[WireMock URL]/payments",
                                req.body
                            );

                            res.json(payment.data);
                            });

                            module.exports = router;
Step 6: Run the Node Service
In a terminal, start the service you created by running:
Node server.js
Document with OpenAPI
You can generate API documentation for the payment API service by creating openapi.yaml with the following contents:
Note: You’ll need to create additional paths for the remaining methods defined in the API.
                            openapi: 3.0.0
                            title: Payment API
                            version: 1.0.0

                            paths:
                            /payments:
                                post:
                                summary: Create a payment
                                requestBody:
                                    content:
                                    application/json:
                                        schema:
                                        type: object
                                        properties:
                                            amount:
                                            type: integer
                                            currency:
                                            type: string
                                responses:
                                    "200":
                                    description: Payment created
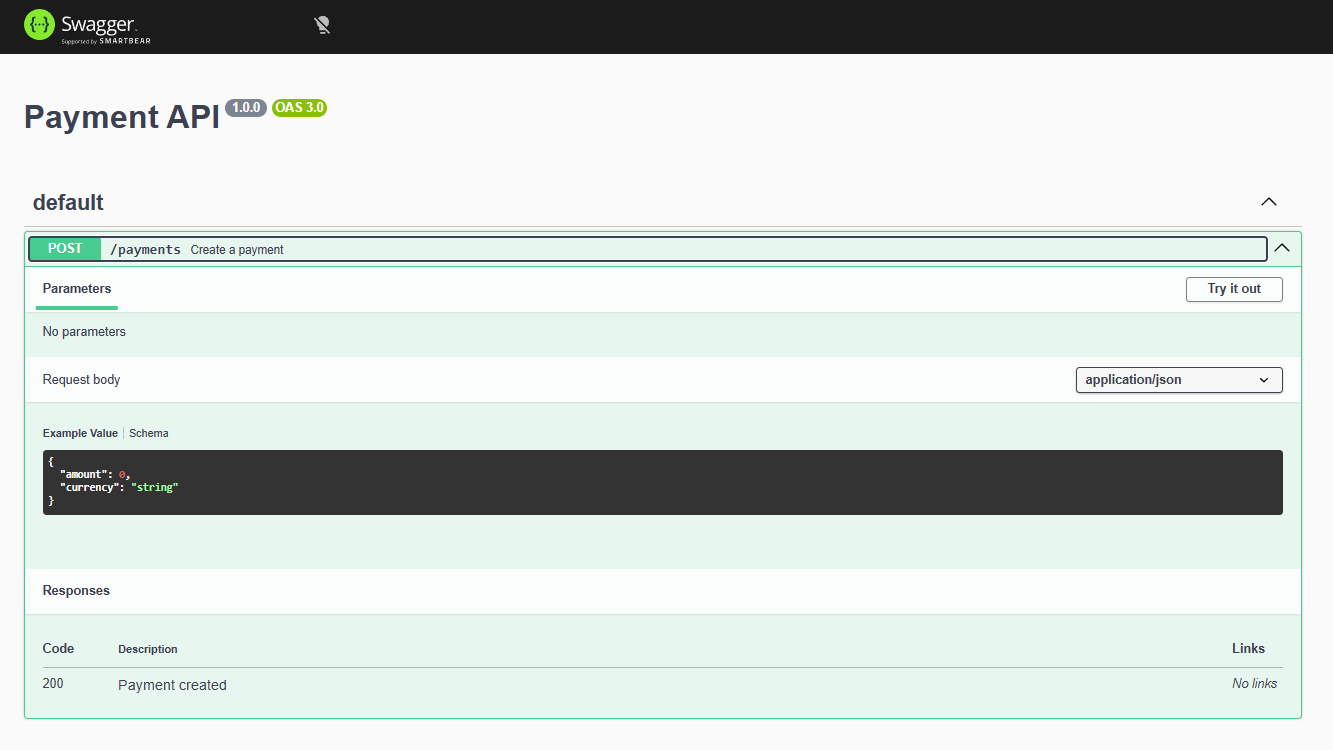
Serve the Documentation
Render the docs by running the following commands in a terminal:
                            npm install swagger-ui-express
                            const swaggerUi = require("swagger-ui-express");
                            const YAML = require("yamljs");

                            const swaggerDoc = YAML.load("./openapi.yaml");

                            app.use("/docs", swaggerUi.serve, swaggerUi.setup(swaggerDoc));
After the server starts running, visit: http://localhost:3000/docs to view the documentation output.
Load Test the API
Use Grafana k6 to to load test and simulate traffic to the API.
Install
Install k6 in Windows by running the following command in your administrative shell:
choco install k6 -y
Verify the installation by closing and reopening your command prompt then running:
k6 version
Create a Test File
Create load-test.js with the following code:
                            import http from "k6/http";

                            export default function () {

                                http.post("https://[WireMock URL]/payments",
                                    JSON.stringify({
                                    amount: 5000,
                                    currency: "usd"
                                    }),
                                    { headers: { "Content-Type": "application/json" } }
                                );
                            }
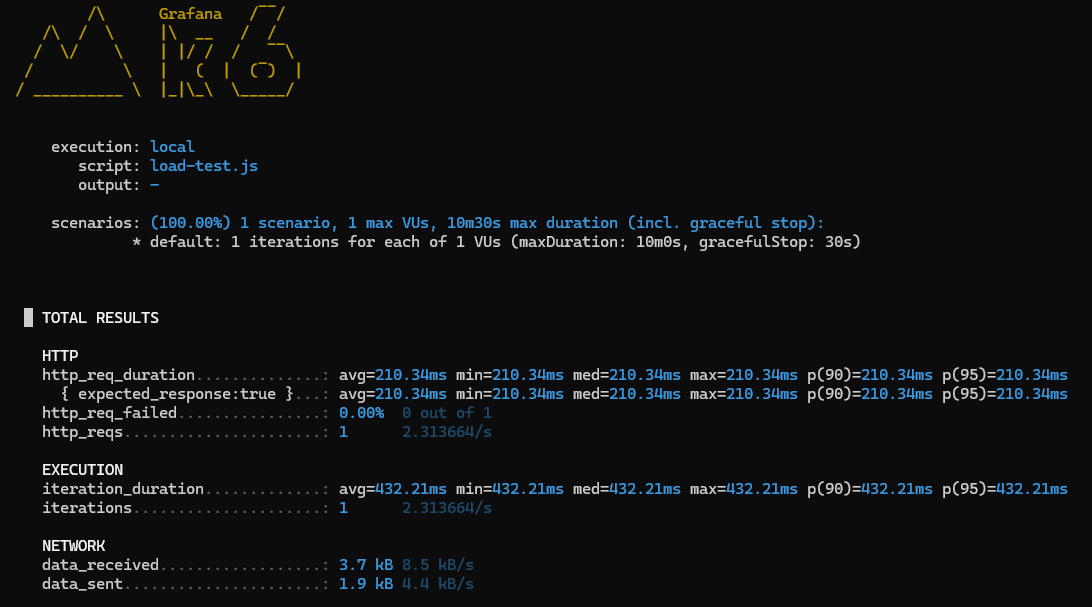
Run the Load Test
Run the test with:
k6 run load-test.js
Example output:
This data shows how your API service behaves under load.
Final Architecture
You’ve built an API payments integration service with the following architecture:
